Table of Contents

So you don’t have an outdoor faucet where you would like it? Many outside chores need a water supply, and it’s not always ideal to run a long hose to the point where you need it. Learn how to install an outside faucet with Pex for a permanent solution. You’ll have your DIY faucet installed just where you want it.
A little bit of plumbing won’t hurt anyone. What it will do is save loads of money which you would otherwise be paying to a plumber. The only things you’ll be spending on are some inexpensive Pex piping and its fittings. Keep reading that it’s not a tough job at all.
Planning
So this particular project will need some pre-planning. Ask yourself where you want the outside faucet to be located. It’s better to jot down multiple spots and then pick the one that’s closest to the plumbing running inside your house. Inspect the basement if you have one or crawl space to find the nearest water pipe running inside the house that you can make a connection. Once you have decided on the best possible location for your outside faucet and the inside water pipe which you’ll work with, you are ready for the actual project.
What You’ll Need for the Project
Here’s a list of materials and tools you’ll need to gather before you begin the project.
- Drill
- PEX cutting tool
- Silicone sealant
- PEX piping
- Pex clamp
- PEX fittings
- Nailing plates
- Frost-free sillcock faucet
- Galvanized screws
- Copper cutter
- Threaded tee
- Soldering iron and solder wire
- Cleaning brush
- Rag
Procedure to Follow
Follow the procedure below to install a new outdoor faucet using Pex piping:
Preliminary steps
- Turn off the water supply to the water pipe that you are working with inside the house. If you can’t find a valve that shuts off the supply to this particular pipe, you will need to turn off the main water supply.
Once the preliminary step is complete, here’s how to install an outside faucet with Pex.
Installing the Faucet
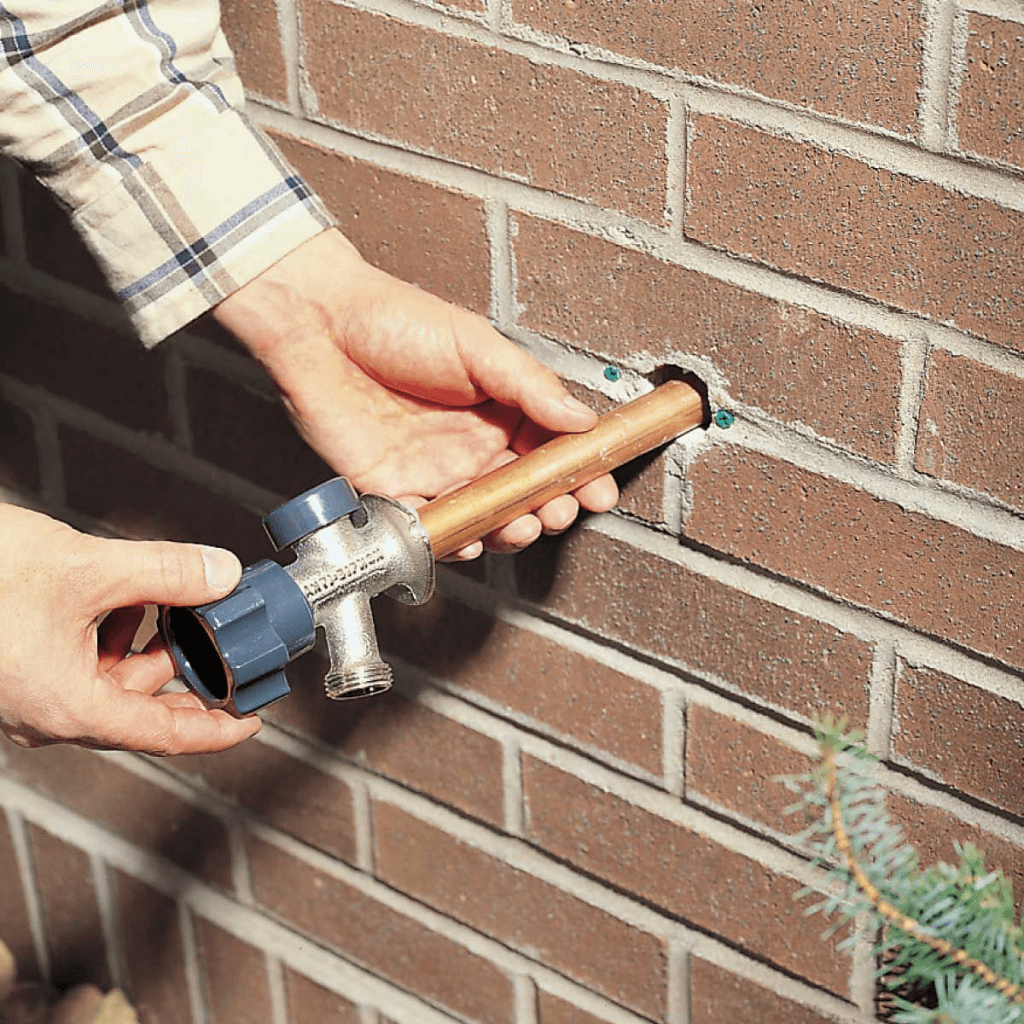
- Drill a hole at the point on the basement wall where you want the outdoor faucet to be located. The hole needs to be 1 inch in diameter so that the sillcock faucet can go through.
- Push the sillcock faucet in the hole from the outside wall and screw it into the wall from both ends using galvanized screws.
- Make sure that the faucet is angled down towards the inside of the house. Taking this additional step will prevent the water from freezing in the cold.
- Seal the connection using a silicone sealant.
Making Connections to the Indoor Water Pipe
- Move to the inside of the house to find the other end of the sillcock faucet, which you just installed.
- Now use a copper cutter to cut the water pipe from where you want the connection.
- Make sure there’s a bucket placed underneath so that any water in the pipes can drain out into it without creating a mess.
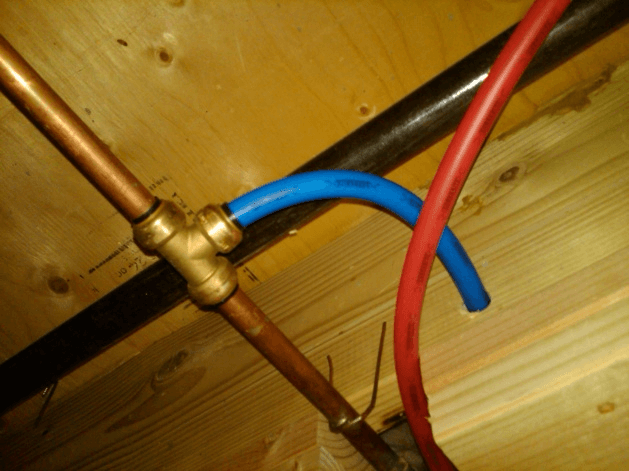
- Install the threaded tee where you made the cut and attach the Pex adapter to its open end.
- Use a soldering iron to secure all the new connections to the water pipe in place.
- Use a rag to wipe off any residues.
Making Connections to the Outdoor Faucet
- Move back to the end of the sillcock faucet that’s inside the house. Clean the end from the inside to make sure nothing is blocking the path for water. You can use a cleaning brush to do this.
- Oil the Pex adapter and attach it to one end of a new water shutoff valve. Now attach the shutoff valve to the end of the faucet using a copper fitting in between. Oil all the ends before making the connections.
- Using a soldering iron and some solder wire, secure all the new connections in place.
- Using a rag, wipe off any solder residues on the connections.
- Let the connection cool down before installing Pex pipe since it’s plastic and can melt.
Connecting Pex Piping

- Install your Pex pipe into the open end of the connection you made to the water pipe inside the house. Place in a Pex clamp and tighten it to secure the connection.
- Run the Pex pipe over the roof of your basement, securing it with 1-inch Pex clips at suitable intervals.
- Bring the Pex pipe to the inside end of the faucet, clipping it at the roof throughout the length.
- Use a Pex cutter to cut the Pex piping where you need to make a connection to the faucet.
- Connect it to a Pex adapter at the end of the faucet using an expansion tool.
- Tighten the connection using a Pex clamp just like you did at the other end.
Test Run Your Project
Time to check if your Pex outdoor faucet works. If you followed all the steps, there’s no reason why it shouldn’t!
- Remember the water valve you turned off before starting the project? Whether it’s the main valve supplying water to your house or only for the water pipe you worked with, turn it back on.
- Turn the shutoff valve that you installed to the inside end of the faucet into on position as well.
- Move outside the house and turn on the faucet.
- There! We have water!
Conclusion
See how simple that was. Once you get your head into the project, you’ll even have fun setting up your own DIY outdoor faucet! And of course, you’ll be saving tons of money doing it. Once you have learned how to install an outside faucet with Pex, the actual project isn’t that hard.
It will barely take you an hour to complete the entire thing, and the result is worth the effort! You’ll have water just where you need it for watering your garden, washing your car, or any other outdoor chore that you may have in your mind.